This is the 3rd chapter of the “Git – Simplified” course, in which we will go through Git from zero to hero. If you are just starting out with Git I highly recommend you to go to the 1st chapter in order to learn the basics of Git.
Table of Contents
Topics in this chapter
In this chapter we will go through the following topics:
- What is a remote repository? (including local-remote architecture)
- Adding SSH keys for remote work
- Adding a remote repository to your project (Github)
- Git fetch
- Git pull
- Git push
- Replacing a remote
- Adding additional remote
- Cloning a repo
🎤 Webinar recording (Hebrew)
You can find the presentation (ppt file) at this link. The recorded session of the webinar is live! you can view it here:
🤓 The remote repository
Finally! in this chapter, we will learn about remote repositories. This is the most important aspect of Git as it finally allows you to work in teams, and also backup your code on a remote server.

What is a remote repository?
Well, in simple terms – a remote repository is just the same as your local repository! It contains your commits, branches, tag, history, and other metadata you have on your local repository.
The only difference between a local repo to a remote repo is:
- Remote repository is usually a server that stores your repo (not on your computer)
- It can be Github, Bitbucket, Gitlab or other Git managed websites
- You must authenticate in order to make changes to the remote repository
- Have the same capabitlies as your local repository (merge, commit, tag, branching)
- You must “sync” your changes with the remote repository (using commands like push, pull and fetch)

In other words, when working on your local repository you can push all of your commits, branches, tags, and other Git-managed “stuff” to the remote repository. This allows you to later “clone” that repo into a new computer, which will eventually create the same local repo you had.
Local-remote architecture
In order to work with remote repositories, we first must understand how the “architecture” of local-remote repositories work.
This will allow us to understand how to push changes, get new changes from the server, and even sync only what we require.
Let’s take a look at this architecture:
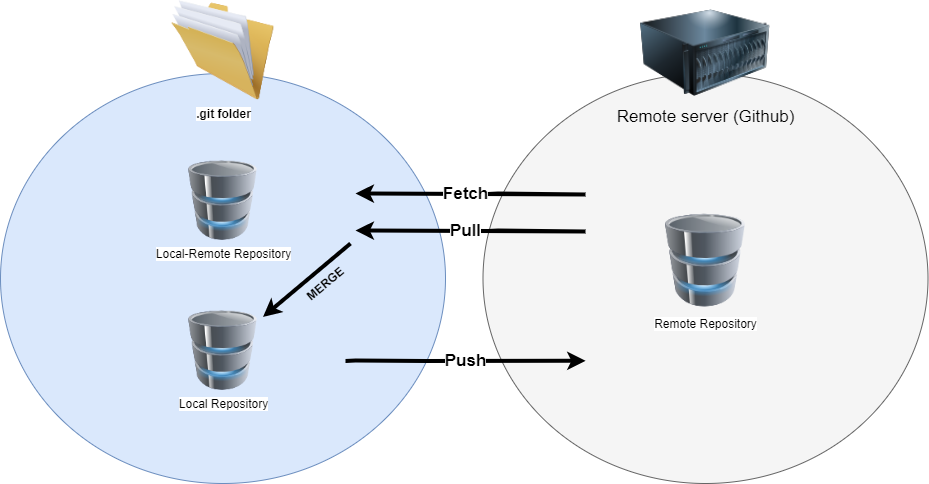
On the left side, we can see our computer-managed .git directory (which is the local repository we have known until now). But wait! you probably ask yourself, what?? what is the “local-remote” repository we can see on the left? until now you only knew we had a “local repository”.
The Local-Remote Repository is an actual “clone” of what the remote repository has. Think of it as the same remote repository you have on the right, but a local copy.
Every time we work with Git and run the git fetch the command we actually tell Git “sync up with the remote repository, copy everything you know of it, and put it on my local-remote repository”.
Every time we sync up with the remote repository, all pull and fetch commands actually put all of the last changes the remote repository has to our local-remote repository.
Every time we push we directly push the changes back to the remote repository.

🛠️ Setting up our environment to work with a remote repository
In this guide, we will only work with Github and set up a sample repository.
In order to start with Github you must first have the following:
- A Github account (register here)
- Git bash (download here if you still don’t have it)
Setting up SSH keys
Now we will need to set up our Github account with the correct SSH keys. Think of SSH keys as a secure way of telling Github you want to authenticate. You can always authenticate with Username \ Password, which is not the recommended way of doing so.
In order to do so, open your Github account, click on your profile > Settings > SSH and GPG Keys:
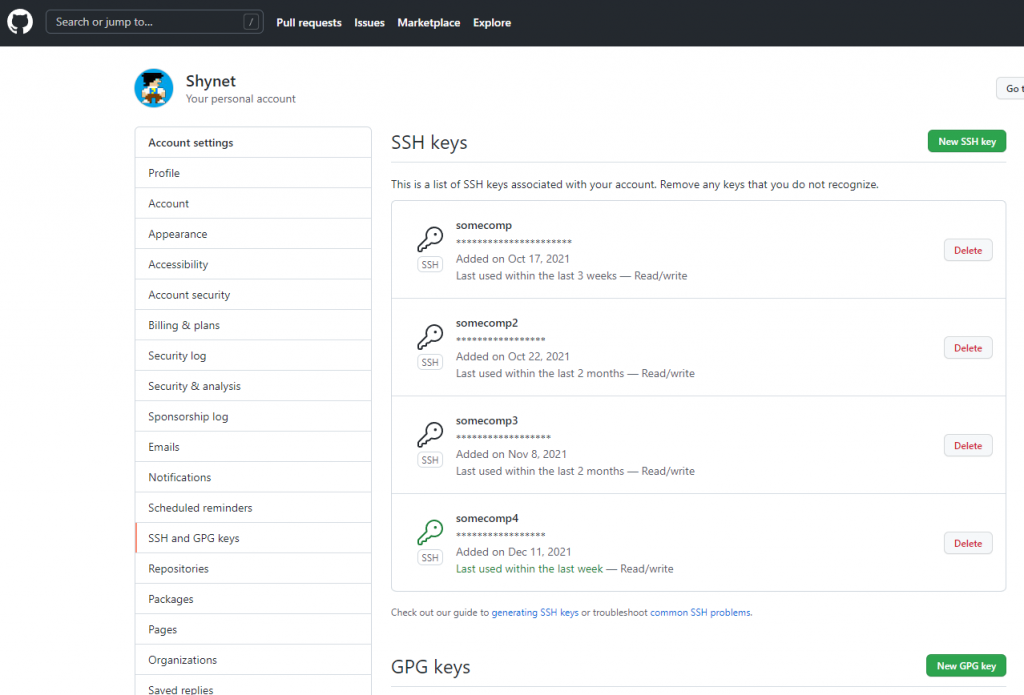
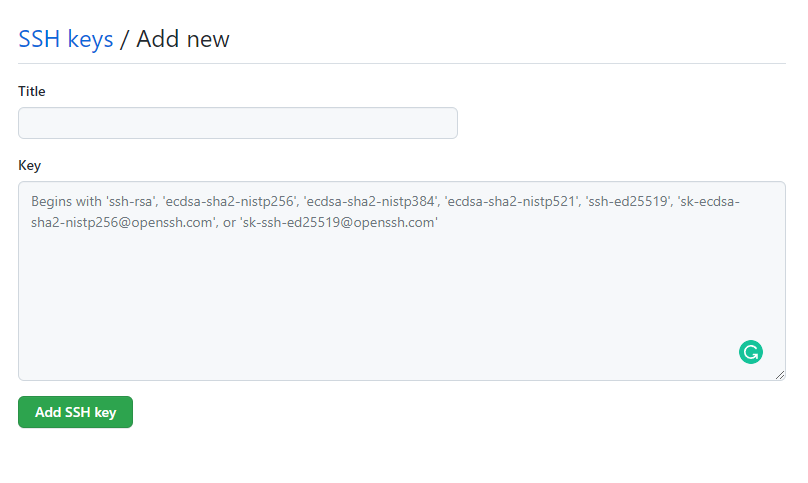
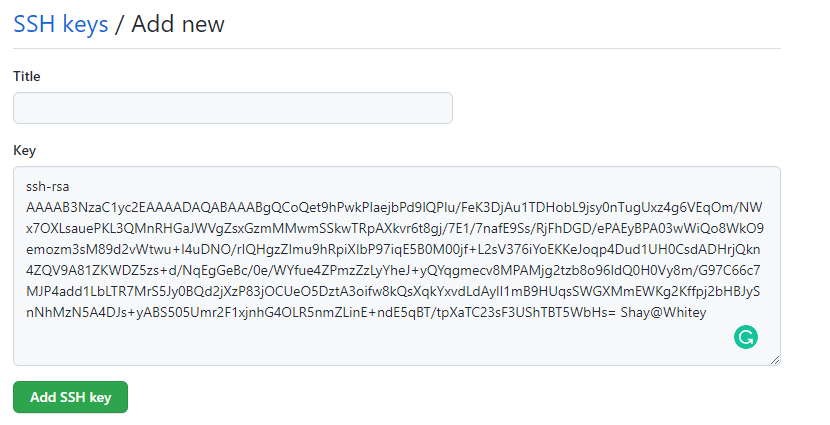
Now click on “New SSH key”. After that you should prompt with a new window requesting for a Title and a Key:
What we should do now is simple. Open up your git bash, and type the following:
> ssh-keygen # Tells our computers to generate ssh keys
# Here just press enter multiple times and don't enter anything
If you typed everything correctly your key was generated, and it was saved to the default location under our home directory under a file named id_rsa.pub, in order to get our key, simply type the following command:
> cat ~/.ssh/id_rsa.pub
ssh-rsa AAAAB3NzaC1yc2EAAAADAQABAAABgQCoQet9hPwkPIaejbPd9lQPlu/FeK3DjAu1TDHobL9jsy0nTugUxz4g6VEqOm/NWx7OXLsauePKL3QMnRHGaJWVgZsxGzmMMwmSSkwTRpAXkvr6t8gj/7E1/7nafE9Ss/RjFhDGD/ePAEyBPA03wWiQo8WkO9emozm3sM89d2vWtwu+I4uDNO/rIQHgzZImu9hRpiXIbP97iqE5B0M00jf+L2sV376iYoEKKeJoqp4Dud1UH0CsdADHrjQkn4ZQV9A81ZKWDZ5zs+d/NqEgGeBc/0e/WYfue4ZPmzZzLyYheJ+yQYqgmecv8MPAMjg2tzb8o96ldQ0H0Vy8m/G97C66c7MJP4add1LbLTR7MrS5Jy0BQd2jXzP83jOCUeO5DztA3oifw8kQsXqkYxvdLdAylI1mB9HUqsSWGXMmEWKg2Kffpj2bHBJySnNhMzN5A4DJs+yABS505Umr2F1xjnhG4OLR5nmZLinE+ndE5qBT/tpXaTC23sF3UShTBT5WbHs= Shay@Whitey
Now copy the output all from the ssh-rsa until the end, and paste it into the “Key” text field:
In order to test out that our key actually works, we can type the following command:
$ ssh -T git@github.com
Hi shy2net! You've successfully authenticated, but GitHub does not provide shell access.
If you didn’t put the correct key, apparently you have done one of the steps incorrectly, please try again. You can read more about the authentication testing here . If it says something like the following:
> The authenticity of host 'github.com (IP ADDRESS)' can't be established.
> RSA key fingerprint is SHA256:nThbg6kXUpJWGl7E1IGOCspRomTxdCARLviKw6E5SY8.
> Are you sure you want to continue connecting (yes/no)?
Simply type yes and enter. that should solve it.
Now that our SSH keys are ready, let’s create our first remote repository!
😃 Setting up our first remote repository
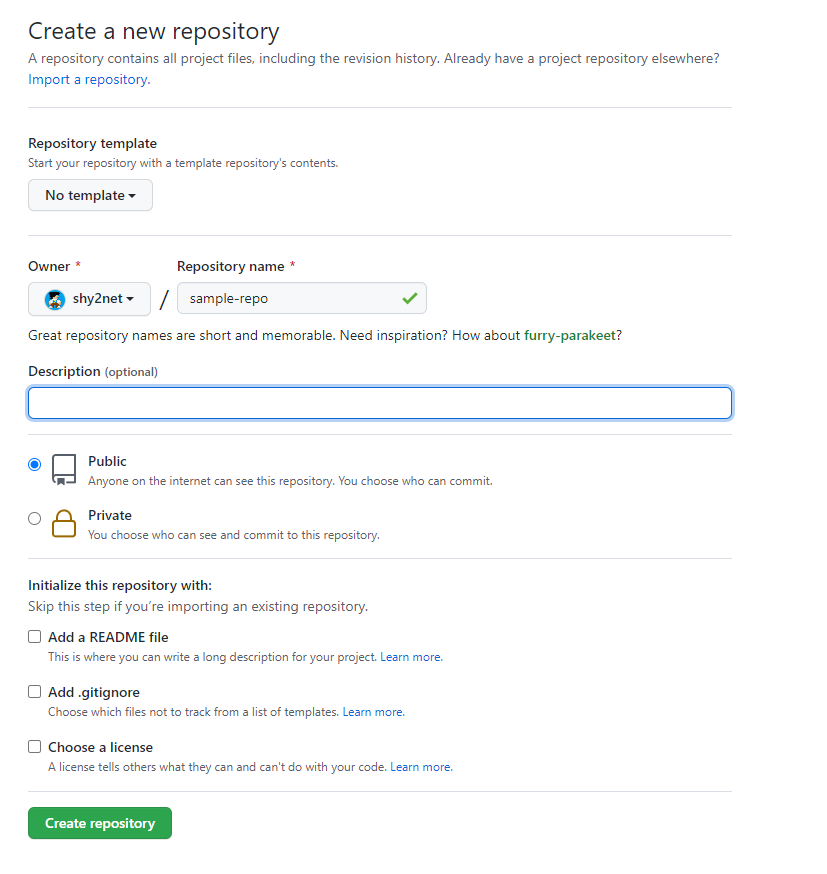
Now we will set up our first remote repository. Open up your Github and right to your “Repositories” click on “New”:

Now you will be redirected to the repository creation form, in the “Repository name”, type in “sample-repo” and click on “Create repository”:
Now that we have our first remote repository setup, we need to push our local repository code into it.
Creating our local repository and pushing the code to the remote repository
Now let’s create our local repository, perform a commit and push it to the server:
- Create a new folder on your computer called
sample-repo - Open up your git bash under that directory and type
git init - Create a file called
a.txt, typeHello worldin it and save the file. - Commit our file:
> git add a.txt
> git commit -m "first commit"
Now that we have committed our code locally, we want to sync this commit to the remote repository we have just created. For that, we will learn about the git push command.
Before we will learn about the git push command we need to first tell Git that this local repo should sync with our remote repo.
Configuring our local repo to sync with our remote repo
Open up our Github page on our sample-repo page and copy the URL of our remote repo:

Now that we have copied the URL we can open up our git bash under our repo again and type the following (don’t forget to replace the URL to your repository):
> git remote add origin git@github.com:shy2net/sample-repo.git # Replace the URL with your repository url!This tells Git that we want to add a new remote repository called “origin”, with the URL of the sample-repo located under Github.
Now that we have successfully set up our remote repository, we can push our first commit.
Git push
The git push command tells git “I want to take all of the latest commits on this branch, and push them to the remote repository”.
What it actually does is the following:
- Pushes the branch (if it does not exist on the remote, it creates it)
- Then pushes all of the commits the remote repository doesn’t have
- Syncs only differences, commits already pushed in the past won’t be included
The git push command is one of the most used commands, that actually tells git “I want to apply the changes and this branch to the remote repository”.
Now, we want to push our code to the remote repository, we will use the following command:
$ git push origin master
Enumerating objects: 3, done.
Counting objects: 100% (3/3), done.
Writing objects: 100% (3/3), 216 bytes | 216.00 KiB/s, done.
Total 3 (delta 0), reused 0 (delta 0), pack-reused 0
To github.com:shy2net/sample-repo.git
 * [new branch]      master -> master
This tells Git: “I want to push the changes I applied on the master, to the remote called ‘origin'”. Our “origin” remote is the Github repository we set up.
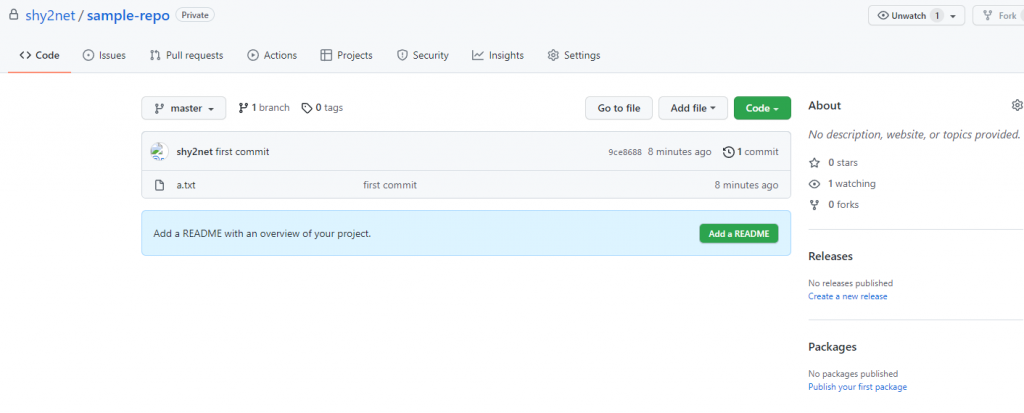
Now if we did everything right we should be able to go to Github and see the following:
Now that we have pushed our first code to get, we are ready to do the opposite: fetch and pull!
Git fetch
The git fetch tells Git we want to “fetch” the latest changes, and save them on our “local-remote” repository. This means our local repository won’t be damaged and branches won’t be affected. We will save all of the changes to the “side” (the local-remot repo).
Before we will “fetch” any content, we must first make our changes on the remote repository directly and then fetch them.
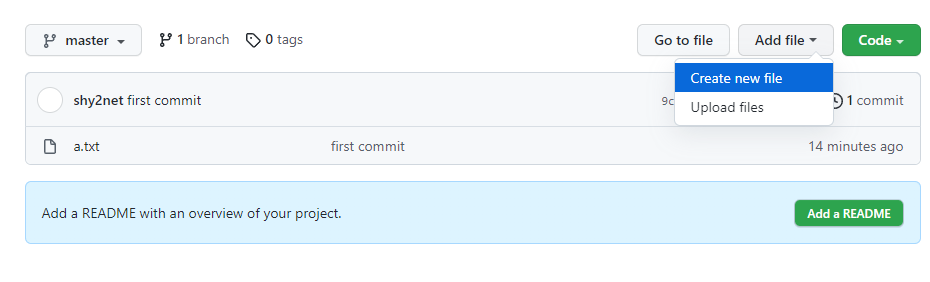
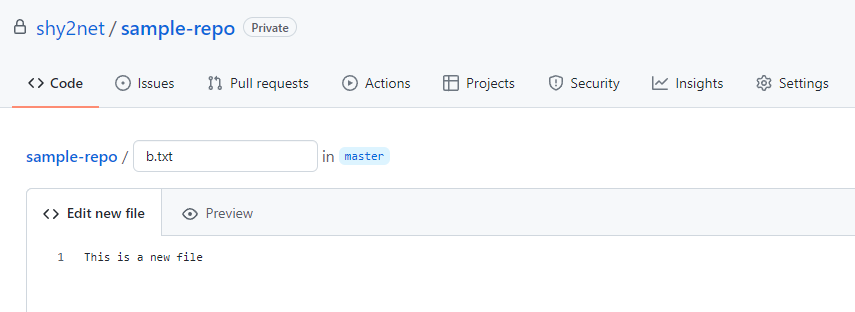
- Open up our repository on Github, and click “Add file > Create new file”:
- In the file name type
b.txtand in the content type: “This is a new file”:
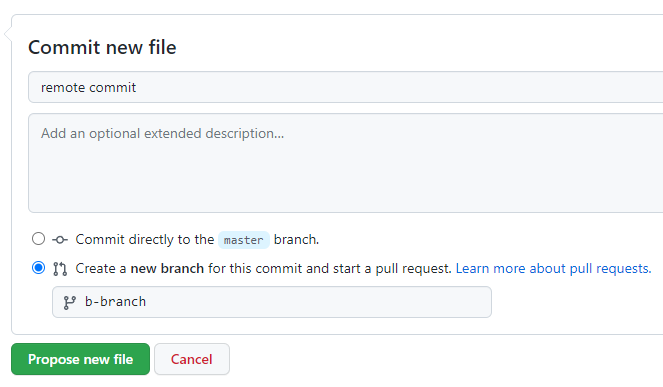
- Now scroll to the bottom and type in the “Commit new file” (the 1st field): “remote commit”, then choose “Create a new branch for this commit and start a pull request”, type in: “b-branch” and click “Propse new file”:
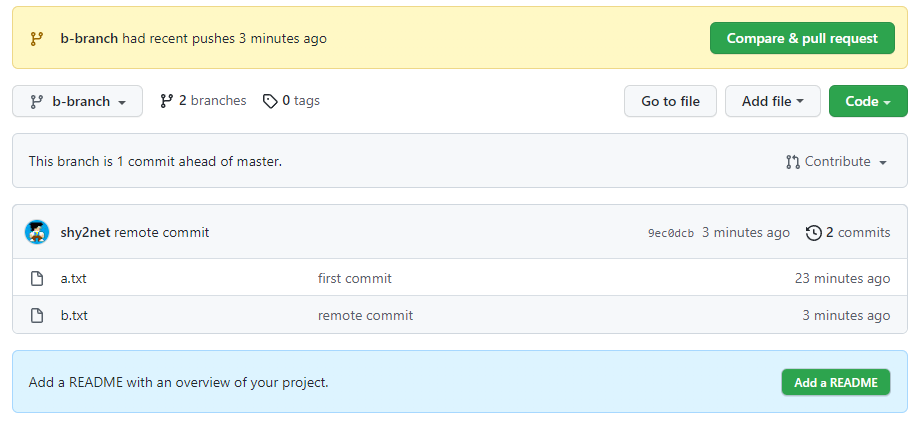
- Now in the “Open a pull request” don’t do anything and click on “Code”, you should see the following:
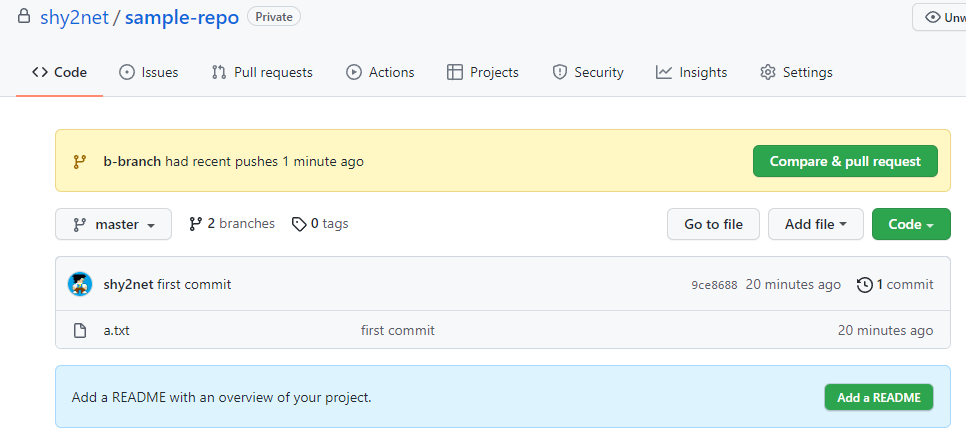
b-branchNow that we have created a new branch called b-branch with a new file called b.txt, we can see it by clicking on the “master” on the top left and then selecting “b-branch”:
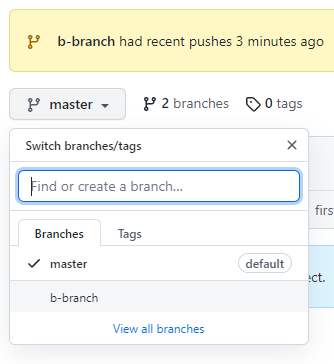
And when we will click on it we will see the new file:
Now that we have added a new commit on the remote repository, we want to “fetch” it by running the following command:
$ git fetch
remote: Enumerating objects: 4, done.
remote: Counting objects: 100% (4/4), done.
remote: Compressing objects: 100% (2/2), done.
Unpacking objects: 100% (3/3), 641 bytes | 160.00 KiB/s, done.
remote: Total 3 (delta 0), reused 0 (delta 0), pack-reused 0
From github.com:shy2net/sample-repo
 * [new branch]      b-branch   -> origin/b-branch
Now we can see that a new branch was added at the remote! But wait, how can we see it? in order to see it type the following command:
$ git branch -a
* master
  remotes/origin/b-branch
  remotes/origin/master
We can see the “remotes/origin/b-branch” this means there is a new branch called “b-branch” on the remote repository, and it is saved on our local-remote repository. Now we can even move to that branch:
$ git checkout remotes/origin/b-branch
Note: switching to 'remotes/origin/b-branch'.

You are in 'detached HEAD' state. You can look around, make experimental
changes and commit them, and you can discard any commits you make in this
state without impacting any branches by switching back to a branch.

...
This will let us move to the “remote” branch without actually creating that branch locally on our computer. We won’t be able to do any changes here, in order to actually do so, we need to create that branch locally on our computer with the same name. To do so we can simply type the following:
$ git checkout b-branch
Switched to branch 'b-branch'
Your branch is up to date with 'origin/b-branch'.
Now if we type the git log command we will see the following output:
$ git log
commit 9ec0dcb148dc6ae885a4c636f9540beb14ed42e5 (HEAD -> b-branch, origin/b-branch)
Author: Shynet <shynet@gmail.com>
Date:   Tue Jan 4 22:54:43 2022 +0200

    remote commit

commit 9ce86882b107db623dcbfc3ee02b23f41eab2e4b (origin/master, master)
Author: Shynet <shynet@gmail.com>
Date:   Tue Jan 4 22:35:11 2022 +0200

    first commit
See that the “remote commit” is included? Our remote branch was synced locally, and we can do additional commits and push them back using the git push command.
Git pull
The git pull command is one of the most used commands. It is used in order to “pull” the latest changes from the branch on the remote repository and merge them to our current branch.
When you type in the command:
$ git pull origin b-branchThis tells Git: “I want to pull from the remote repository called origin, the branch called b-branch and merge it with the current branch I’m currently working on”.
What this command actually does is two different commands in the background:
$ git fetch
$ git merge remotes/origin/b-branch
That’s it! It simply “fetches” the latest changes done on the remote, and then merges the remote branch to our local branch.
Let’s test it out.
First, perform the following commands:
$ git fetch # Fetch all of the latest changes from the remote
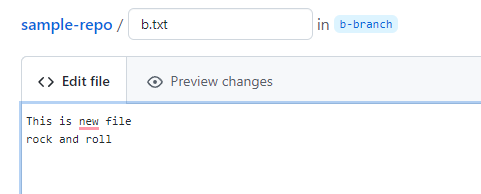
$ git checkout b-branch # Open up the b-branch repoNow we will apply some changes to the b.txt file on “Github” directly and commit them. Open up our repo on Github, click on b.txt file, then click on the “Edit” button (the pen icon):

sample-repo / b.txt file, and click on the pen iconNow add a second line with the test: “rock and roll”:
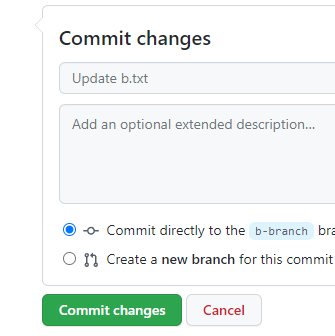
And click on “Commit changes” (no need to change anything):
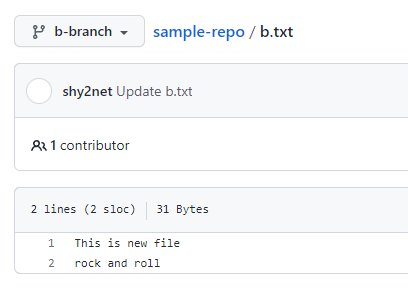
The file b.txt will now be updated with a new commit called Update b.txt:
Now let’s go back to our Git bash and type in the following:
$ git pull origin b-branch
From github.com:shy2net/sample-repo
 * branch            b-branch   -> FETCH_HEAD
Updating 9ec0dcb..d036911
Fast-forward
 b.txt | 1 +
 1 file changed, 1 insertion(+)
What it actually did, is “fetching” the latest changes from the remote, and then merge the “b-branch” branch from the remote to our local “b-branch” repository (which is the one we are currently working on).
Replacing a remote repository
Let’s say you want to move to other repository or even move to a new Git service like Gitlab. What should you do?
Well, that is actually not complicated at all, you can simply create your new remote repository on the Git service you would like (For this example Gitlab) and edit your remote repository origin URL using this command:
$ git remote set-url origin git@gitlab.com:shynet/sample-repo.git # First let's change our repository origin URL to gitlab
$ git push origin --all # Push all of my local repository to the remote
These two simple commands do the following:
- Changes the remote repository
- Pushes all of our local repository to the new remote
That’s it!
Adding additional remote repository instead of replacing it
You can always work with multiple repositories, for example instead of replacing the “origin” repository, we could have just added GitLab as a new one:
$ git remote add gitlab git@gitlab.com:shynet/sample-repo.gitAnd then push all of the local repository changes into it:
$ git push gitlab --allAnd in order to push specific branches you could for example:
$ git push gitlab master # Pushes the master only to gitlabCloning a repository
Cloning a repository means “I want to clone all of this remote repository to my local computer”, as the term “clone” means, we can it’s the same as “duplicating” a remote repository, into a local one.
Cloning a repository is as easy as one command. First let’s open a repository we want to clone, for example the lodash library. Open up the github page and click on “Code” > and then click on the “Copy to clipboard” button:
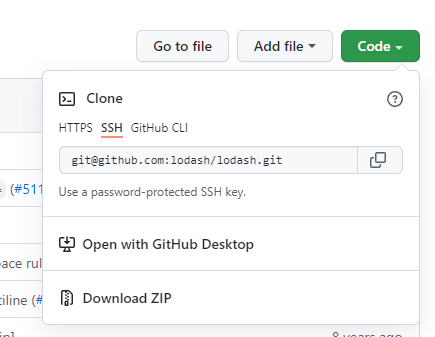
Now simply type the command:
$ git clone git@github.com:lodash/lodash.gitThat’s it! A directory with the name “lodash” will be created and you can open Git bash in it and type in git branch -a and see all of the branches, including even the commits and code.
To Summarize
Hope that you understand remote repositories, the push, fetch and pull commands. Feel free to ask any questions in the comment section and I will reply as soon as possible.